
How to use color correctors for dark circles and redness

Advertisements
Color corrector makeup neutralizes targeted facial discoloration by using opposing shades on the color wheel to cancel out unwanted undertones before you apply foundation or standard concealer. Rather than piling on thick layers of high-coverage skin-toned products, correcting the underlying hue allows you to create an even base using far less makeup.
This technique helps anyone managing persistent dark circles, post-acne marks, broken capillaries, or generalized facial redness who finds standard concealers turning gray or muddy. The catch is that color correctors require precise shade matching to your undertone depth and careful, localized application, as placing the wrong tone or blending beyond the targeted area can leave noticeable pastel or warm patches under your foundation.
The principles of color theory in complexion products
Color correction in cosmetics relies on basic chromatic science, specifically the arrangement of primary, secondary, and tertiary hues on traditional artist color wheels. When two colors located directly opposite one another on the wheel are placed in contact, their optical wavelengths neutralize each other, creating an achromatic or balanced tone. In cosmetic formulation, this means pigments are engineered to suppress specific wavelengths of light reflecting from vascular pooling or surface inflammation.
Advertisements
Traditional flesh-toned concealers operate purely on opacity. They rely on high concentrations of titanium dioxide or iron oxides to physically block light from reaching the skin beneath. When applied over intense blue, purple, or crimson areas, these standard opaque concealers often fail because the dark undertone bleeds through the pigment, creating an unnatural ashen or muddy cast. Introducing a complementary color prior to applying concealer neutralizes that dominant wavelength, allowing a lightweight skin-tone product to match the surrounding area accurately.
Understanding your specific surface discoloration versus your overall skin undertone is essential. Surface discoloration is temporary or localized pigmentation, such as flushed cheeks or broken capillaries, while your undertone is the permanent, subtle hue beneath your skin surface categorized as cool, warm, or neutral. A successful application of color corrector makeup modifies only the unwanted surface discoloration without fighting your natural structural undertones.
Selecting the right shade for dark under-eye circles
Under-eye darkness typically stems from thin skin revealing the underlying orbicularis oculi muscle and superficial blood vessels, which produce deep blue, purple, or slate hues. In deeper skin tones, post-inflammatory hyperpigmentation can also introduce rich brown or gray rings around the orbital socket. Neutralizing these areas requires warm pigments from the yellow, red, and orange families, but the depth of your skin dictates the exact saturation needed.
Advertisements
Matching corrective tones to skin depth
- Fair to light skin: Soft bisque, pale pink, or light peach tones counteract blue and cool purple shadows without darkening the under-eye area.
- Medium to tan skin: Warm peach, apricot, and rich salmon shades cancel out deeper purple, blue-green, and charcoal undertones.
- Deep to rich skin: Intense amber, burnt orange, and terracotta red pigments neutralize rich blue, deep purple, and brown hyperpigmentation without turning ashy.
Before selecting a product, examine your under-eye area in indirect natural daylight. Gently pull the skin taut near the tear duct to observe the true dominant pigment. If the shadow appears distinctly blue, lean toward pure peach or orange. If the area exhibits red-violet or bruised purple tones, select a corrector with stronger yellow or golden-bisque undertones to prevent over-saturating the delicate eye contour.
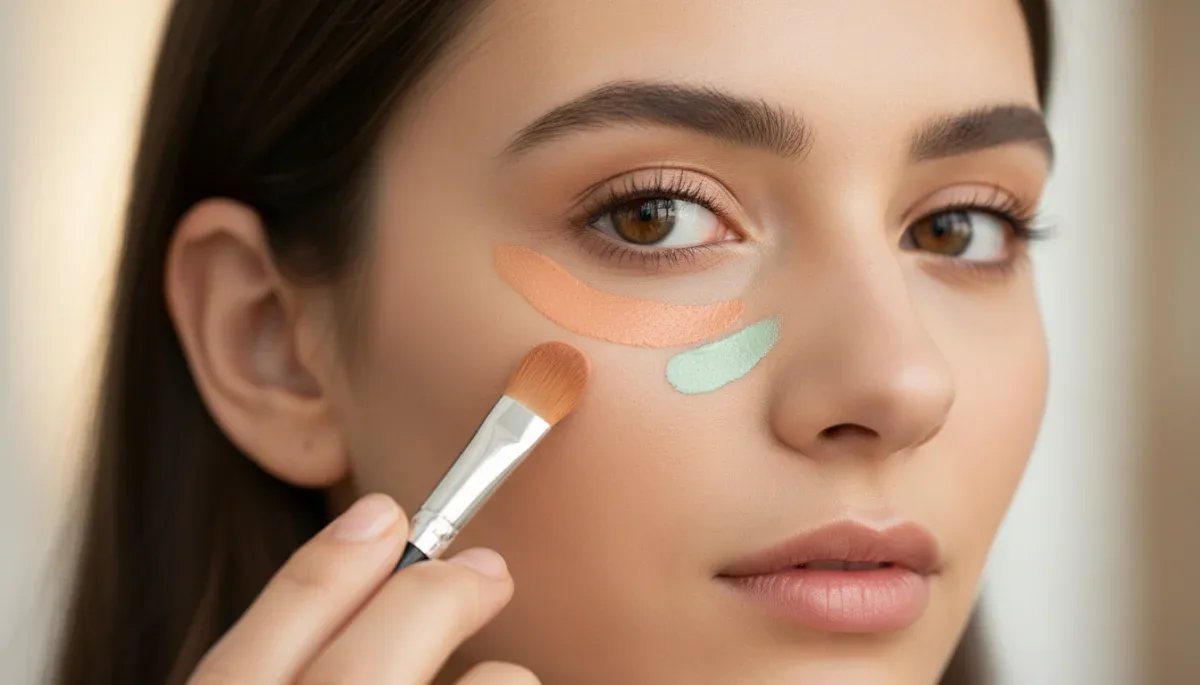
Neutralizing facial redness and broken capillaries
Facial redness generally manifests in two distinct patterns: concentrated focal spots, such as blemishes and broken capillaries, or widespread diffuse erythema across the cheeks, nose, and forehead. Because red sits directly opposite green on the color wheel, green-tinted pigments are the standard choice for cancelling vascular warmth. However, using green requires strict control over formula density to avoid a sickly or flat finish.
For concentrated spots, highly pigmented opaque green cream applied with a micro-detail brush is most effective. Applying green exclusively to the perimeter of a raised blemish or across a visible capillary thread cancels the intense crimson without depositing unnecessary pigment on the surrounding clear tissue. If green corrector spreads onto normal skin, it creates an unnatural olive or gray patch that foundation cannot fully disguise.
For broad redness across the cheeks and center of the face, sheer mint-toned primers or yellow-tinted liquid bases provide a softer correction. Yellow sits adjacent to green on the color wheel and works exceptionally well for warm or olive complexions experiencing mild flushing. A yellow corrector warms the skin while softening pink undertones, often providing a more lifelike finish than pale mint on medium and olive complexions.
Choosing formulas based on skin type and area
The texture of your color corrector determines how smoothly it integrates with subsequent makeup layers and how long it holds up throughout the day. Under-eye skin is the thinnest on the human face and contains few sebaceous glands, making it prone to creasing and flaking. In contrast, the central T-zone and areas prone to redness often produce more oil and feature larger pores.
Under the eyes, fluid serum correctors and emollient cream compacts perform best. Formulas containing hydrating ingredients like glycerin, hyaluronic acid, or squalane provide slip, preventing pigment from settling into fine expression lines. These formulas remain flexible as your facial muscles move, ensuring the correction does not crack or emphasize texture throughout the day.
For blemish-prone areas, oily zones, or the sides of the nose, self-setting matte creams or oil-free liquid correctors are superior. These products contain volatile silicones or film-forming polymers that lock the pigment in place once blended. A setting corrector prevents green or yellow tones from sliding around when you buff liquid foundation across the face, maintaining targeted coverage exactly where you applied it.
Layering and blending techniques for an invisible finish
The key to applying color corrector makeup without creating heavy buildup is using microscopic amounts of product. Color correctors should never be applied with the same generous coverage as standard concealers. The goal is not to mask the skin completely, but to shift the color spectrum of the discoloration closer to your natural tone.
Begin by prepping the skin with a lightweight moisturizer suited to your skin type, allowing it to absorb fully for two to three minutes. Apply a pinhead-sized dot of corrector directly onto the deepest point of discoloration. Using a small synthetic brush or the pad of your ring finger, gently tap and stipple the product into place. Avoid dragging or wiping motions, which spread the pigment too thin in the center while pushing excess color onto clear skin.
Once the corrector is blended to a sheer, semi-transparent veil, allow it thirty seconds to settle. Next, apply your foundation or regular skin-toned concealer directly on top using a gentle pressing or stippling motion with a damp beauty sponge or plush brush. Stippling prevents the base makeup from lifting or intermixing with the underlying color corrector, keeping the corrective pigment anchored to the skin.
Common mistakes that lead to cakey or discolored results
One of the most frequent errors in color correction is applying the product over too wide an area. Spreading an under-eye peach corrector across the entire orbital cheekbone rather than strictly along the dark hollow creates an orange halo beneath your foundation. Always keep the corrective pigment contained precisely within the boundaries of the unwanted tone.
Another common misstep is selecting a corrector that is too bright or insufficiently saturated for your skin depth. Applying a pastel mint green onto rich, deep skin creates an immediate chalky, gray appearance that cannot be corrected by foundation. Deep complexions require olive, mustard-yellow, or deep terracotta tones rather than pastel or chalky variants.
Finally, using excessive powder between steps can cause heavy product buildup and localized cracking. While setting an oily blemish with a light dust of translucent powder before foundation can help keep coverage in place, layering multiple powders under the eye creates immediate cakey texture. Limit powder application to a single, fine sweep of finely milled setting powder as the final step of your complete complexion routine.
At a glance
| Factor | What to know |
|---|---|
| Under-eye darkness | Use peach for fair skin, apricot for medium skin, and deep orange or red for rich skin tones. |
| Facial redness | Use pinpoint green creams for blemishes and broken capillaries; use soft yellow or mint primers for broad flushing. |
| Application method | Apply minimal product directly to the discoloration and stipple base makeup over top without dragging. |
| Formula selection | Choose hydrating liquid or serum textures for eyes; select oil-free, self-setting creams for oily or red zones. |
Frequently asked questions
Do I apply color corrector before or after foundation?
Apply color corrector before your foundation and skin-toned concealer. Placing the corrective pigment directly against bare, prepped skin neutralizes unwanted undertones at the base level, allowing your foundation to sit smoothly on top and provide a uniform, natural skin tone without showing unusual color casts.
Can I wear color corrector by itself without foundation?
You cannot typically wear standalone color correctors without makeup over them, as green, orange, or purple tones will remain visible on your skin. However, sheer color-neutralizing primers or skin-adjusting CC creams formulated with micro-encapsulated pigments can be worn alone to soften redness without full foundation.
Why does my under-eye area look gray after applying concealer?
Your under-eye area looks gray because cool blue or purple shadows are showing through an opaque or light-toned concealer. To fix this, tap a small amount of warm peach or amber corrector over the dark area first to cancel the blue tones before applying your standard concealer.
How do I stop my color corrector from mixing into my foundation?
Use a self-setting corrector or let your liquid corrector dry for thirty seconds before applying foundation. When adding your foundation, gently press or stipple the product on top using a damp makeup sponge rather than wiping or buffing with a dense brush, which disturbs the underlying layer.
The bottom line
Mastering color correction allows you to neutralize stubborn dark circles and facial redness using significantly less makeup, resulting in a fresher and more natural complexion. Success comes down to understanding the color wheel, choosing a shade depth that complements your skin tone, and applying microscopic amounts only where discoloration exists. Before purchasing a new corrector, check your face in bright, natural daylight to identify your true primary undertones and avoid buying shades that fight your skin's natural baseline.
Written by
Maria Teixeira
Maria Teixeira writes about clothes, makeup and benefits for bestinyour.com. Each article explains how things work, compares published details such as prices, policies and program rules, and points readers to the official source before they decide.