
Advertisements
Learning how to Master Underpainting Makeup is the ultimate secret to achieving a seamless, second-skin complexion that stays fresh all day. By reversing your usual routine and layering cream contour and concealer underneath your base, you create soft-focus dimension without any harsh lines.
This reverse-layering beauty technique blends cream bronzer and strategic highlighting beneath a lightweight skin tint or sheer foundation. The soft glow diffuses through the coverage layer, giving you a naturally sculpted look that prevents product caking and withstands heat and wear for up to 12 hours.
Discover the exact 4-step professional process to perfect this viral reverse-contouring method for 2026. Upgrade your daily beauty routine, master seamless blending, and unlock a radiant, long-lasting finish that looks completely effortless.
Advertisements
Understanding the Core Principles of Underpainting
Underpainting fundamentally reverses the traditional order of makeup application, placing contour, blush, and highlight products directly onto bare skin or a freshly primed canvas.
This strategic placement allows for the subsequent foundation layer to act as a veil, softening and diffusing the underlying colors for a truly integrated effect.
Advertisements
The technique’s success hinges on the principle of layering for diffusion, where each product contributes to a harmonious overall look rather than sitting distinctly on the skin’s surface.
This creates a dimensional, sculpted appearance that appears to emanate from within, rather than being applied on top.
Crucially, the products chosen for underpainting are typically cream or liquid formulas, which blend seamlessly and provide a more skin-like finish.
Powder products, if used, are reserved for setting or adding a final touch, maintaining the integrity of the smooth, natural base created by the underpainting method.
Step 1: The Strategic Application of Cream Contour and Highlight
The initial phase of the underpainting makeup technique involves the precise application of cream contour and highlight.
This step is foundational, as it establishes the underlying structure and luminosity of the face before any foundation is applied, ensuring a natural depth and glow.
Selecting the right shades is paramount: a cool-toned contour color, two to three shades deeper than your natural skin tone, should be used to create shadows, while a subtle, non-glittery highlight enhances high points.
These products work together to sculpt the face in a subtle, believable manner.
Choosing the Right Products for Underpainting
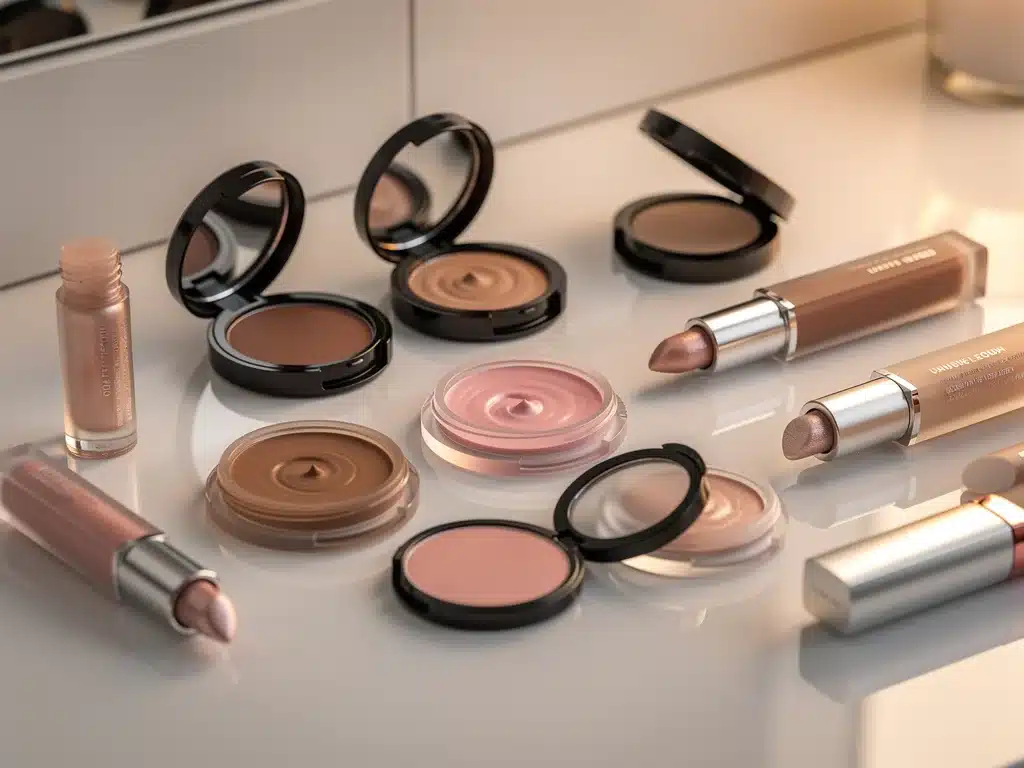
- Cream Contour: Opt for blendable, matte or satin-finish cream sticks or pots in a cool-toned shade.
- Cream Highlight: Select a liquid or cream highlighter that offers a soft sheen rather than glitter particles.
- Tools: Small, dense synthetic brushes or damp beauty sponges are ideal for precise application and blending.
Application involves placing contour in the hollows of the cheeks, along the jawline, and on the temples, while highlight is applied to the tops of the cheekbones, brow bone, and cupid’s bow.
Blending immediately after application is crucial to avoid harsh lines and ensure a smooth transition, setting the stage for the next step of the underpainting process.
Step 2: Integrating Cream Blush for a Natural Flush
Following contour and highlight, the second step in the underpainting makeup technique introduces cream blush.
This application, prior to foundation, allows the blush to meld with the skin, creating a healthy, natural flush that appears as if it’s coming from within, rather than sitting on the surface.
The choice of cream blush is critical for achieving this seamless integration. Liquid or cream formulas are preferred for their blendability and ability to mimic the skin’s natural texture, contributing to the overall natural finish that is the hallmark of this technique.
Selecting and Applying Cream Blush
- Shade Selection: Choose a shade that complements your natural skin tone when you blush naturally.
- Application Points: Apply to the apples of the cheeks, blending upwards towards the temples.
- Blending Tools: Use fingertips, a stippling brush, or a damp sponge for a diffused effect.
Applying blush at this stage ensures that once foundation is layered over, the color appears diffused and soft, avoiding any stark lines or overly pigmented areas.
This contributes significantly to the desired seamless 12-hour natural finish, making the complexion appear vibrant and healthy without looking heavily made up.
Step 3: The Art of Layering Sheer Foundation
With the contour, highlight, and blush strategically placed and blended, the third step involves carefully layering a sheer or medium-coverage foundation.
This is where the magic of the underpainting makeup technique truly comes to life, as the foundation acts as a filter, unifying the base while allowing the underlying dimensions to peek through.
The key to this step is to use a foundation formula that is not too opaque, allowing for the subtle diffusion of the pre-applied products. Overly thick foundations can negate the benefits of underpainting by completely covering the sculpted areas, defeating the purpose of the technique.
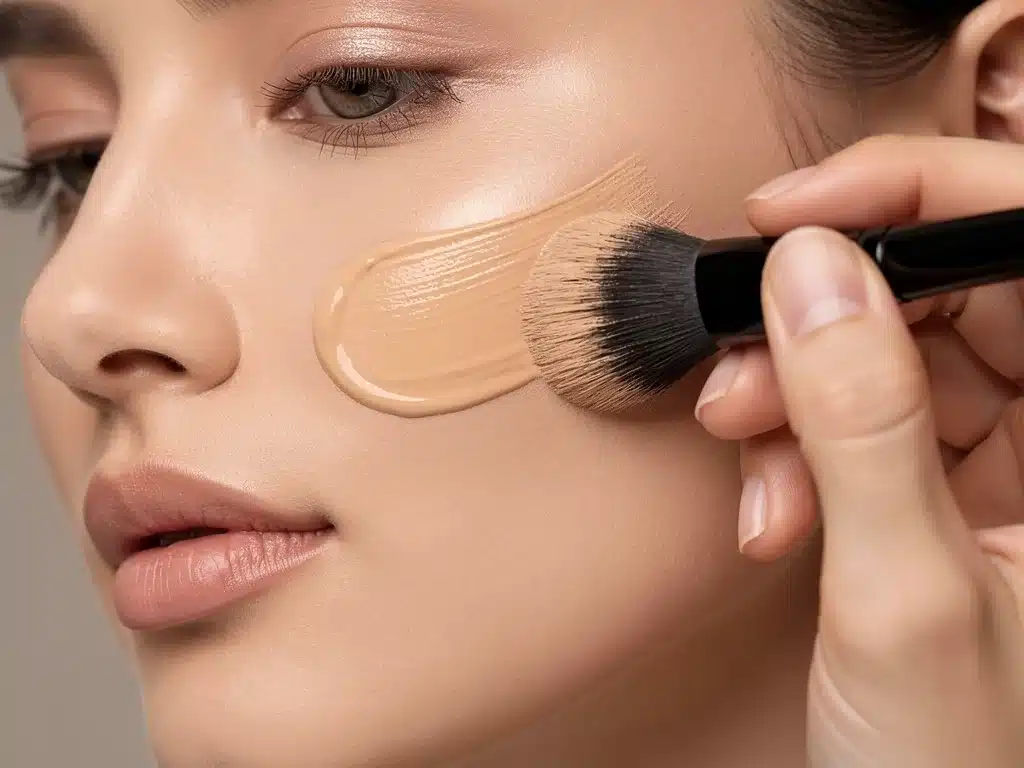
Application methods are also crucial. Instead of heavily rubbing or dragging the foundation, a gentle patting or stippling motion with a damp beauty sponge or a soft brush is recommended.
This ensures an even, thin layer that blends seamlessly without displacing the underpainted layers, preserving the natural dimension.
Tips for Flawless Foundation Application
- Foundation Type: Opt for liquid or serum foundations with buildable, sheer to medium coverage.
- Application Method: Use a damp beauty sponge or stippling brush for light, even coverage.
- Coverage Control: Start with a minimal amount and build up only where needed, focusing on areas requiring more correction.
This thoughtful application of foundation is what transforms the initial bold strokes of contour and highlight into a soft, natural-looking definition.
The result is a complexion that appears effortlessly sculpted and radiant, maintaining its integrity for a seamless 12-hour natural finish, which is a core benefit of the underpainting approach.
Step 4: Setting and Refining for 12-Hour Longevity
The final step in mastering the underpainting makeup technique is setting and refining the look to ensure its 12-hour longevity. This phase is crucial for locking in the meticulously applied layers, preventing creasing, and maintaining a fresh appearance throughout the day.
Strategic use of setting powders and sprays is essential here. Lightly dusting translucent powder in areas prone to shine, such as the T-zone, helps to control oil without dulling the luminosity created by the underpainting. This ensures the natural finish remains intact.
A good setting spray can further enhance the wear time and meld all the layers together, creating a more cohesive, skin-like texture.
This final touch is what truly cements the seamless 12-hour natural finish, making the makeup resilient against environmental factors and natural skin oils.
Essential Setting and Refining Products
- Translucent Setting Powder: A finely milled powder applied sparingly with a fluffy brush.
- Setting Spray: A long-lasting formula that helps fuse makeup layers and extend wear.
- Blotting Papers: For touch-ups throughout the day without disturbing the base.
This comprehensive approach to setting ensures that the underpainting technique delivers on its promise of extended wear and a consistently flawless look.
By following these steps, the makeup not only looks impeccable upon application but also maintains its integrity and fresh appearance for an impressive 12 hours, a key advantage of this method.
Product Recommendations for Optimal Underpainting Results
Achieving a truly seamless 12-hour natural finish with the underpainting makeup technique heavily relies on the quality and formulation of the products used.
Investing in well-performing cream and liquid products is paramount, as their blendability and longevity directly impact the final outcome.
When selecting contour products, look for shades that mimic natural shadows rather than appearing orange or muddy.
For highlights, aim for subtle luminosity without chunky glitter, ensuring a natural glow that doesn’t overtly sparkle. These choices contribute significantly to the overall undetectable finish.
Cream blushes should offer smooth application and a natural tint, while foundations must be lightweight and provide adjustable coverage. The synergy between these products is what allows the underpainting technique to deliver its signature ethereal and long-lasting effect.
Top Product Categories for Underpainting
- Cream Contour Sticks/Palettes: Fenty Beauty Match Stix, Rare Beauty Warm Wishes Effortless Bronzer Sticks.
- Liquid/Cream Highlighters: Charlotte Tilbury Hollywood Flawless Filter, Saie Glowy Super Gel.
- Cream Blushes: Milk Makeup Lip + Cheek Sticks, NARS Liquid Blush.
- Sheer/Medium Coverage Foundations: Dior Backstage Face & Body Foundation, Armani Luminous Silk Foundation.
These product recommendations are curated to support the core tenets of the underpainting technique: blendability, natural finish, and extended wear.
Utilizing high-quality products simplifies the application process and significantly contributes to achieving a flawless 12-hour natural finish, making the underpainting method a truly effective beauty strategy.
Common Pitfalls to Avoid in Underpainting
While the underpainting makeup technique offers remarkable results, certain errors can compromise its effectiveness and the desired seamless 12-hour natural finish. Awareness of these common pitfalls is crucial for anyone looking to master this advanced application method.
One frequent mistake is using too much product, especially with contour and highlight.
Since these layers are applied directly to the skin and then diffused by foundation, a heavy hand can lead to an overly dramatic or muddy appearance that is difficult to correct. Less is often more with underpainting.
Another common issue arises from improper blending. If contour, highlight, or blush are not thoroughly blended into the skin before foundation, they can appear streaky or patchy once the top layer is applied. Seamless blending at each step is non-negotiable for achieving a truly natural and diffused effect.
Mistakes to Sidestep for a Flawless Finish
- Over-application of Product: Use minimal amounts and build gradually.
- Insufficient Blending: Ensure all cream products are seamlessly blended into the skin.
- Using Heavy Foundation: Opt for sheer to medium coverage foundations to avoid obscuring underpainting.
- Incorrect Product Formulas: Avoid powder products for initial contouring and highlighting.
By avoiding these common pitfalls, users can significantly improve their success rate with the underpainting technique, ensuring a professional-looking and long-lasting result.
Proper product selection and diligent blending are key to unlocking the full potential of this innovative makeup approach, leading to a truly seamless 12-hour natural finish.
Adapting Underpainting for Different Skin Types
The underpainting makeup technique is versatile, but its application can be optimized for different skin types to ensure a perfect seamless 12-hour natural finish.
Understanding these adaptations is crucial for everyone to benefit from this innovative method, regardless of their skin’s specific needs.
For individuals with oily skin, the focus should be on oil-controlling primers and matte or satin-finish cream products that help to manage shine throughout the day.
Setting the underpainted layers with a light dusting of translucent powder, especially in the T-zone, becomes even more critical to maintain longevity and a matte finish.
Conversely, those with dry skin should prioritize hydrating primers and dewy or luminous cream products to enhance moisture and prevent the makeup from looking cakey.
Using a hydrating setting spray can also be beneficial in locking in moisture and providing a fresh, radiant look without emphasizing dry patches.
Skin Type Specific Adjustments
- Oily Skin: Use oil-free primers, matte cream products, and strategic powder setting.
- Dry Skin: Opt for hydrating primers, luminous cream products, and hydrating setting sprays.
- Combination Skin: Tailor product choices and application to address both oily and dry zones.
These tailored adjustments ensure that the underpainting technique performs optimally for each skin type, guaranteeing a comfortable wear and a beautiful, seamless 12-hour natural finish. Personalizing the approach based on individual skin characteristics is key to unlocking the full potential of this advanced makeup method.
The Future of Underpainting in 2026 Beauty Trends
As we look towards 2026, the underpainting makeup technique is poised to solidify its position as a cornerstone in beauty routines, continually evolving to meet demands for efficiency and natural aesthetics.
Its ability to create a seamless 12-hour natural finish aligns perfectly with emerging trends emphasizing skin-like makeup and long-wear performance.
Industry experts predict further innovations in product formulations, with an increased focus on multi-tasking cream products that simplify the underpainting process even further.
We can expect to see more accessible and user-friendly tools designed to enhance blending and precision, making the technique achievable for a wider audience.
The emphasis on a healthy, radiant complexion that appears effortlessly perfected will continue to drive the popularity of underpainting.
Its capacity to deliver dimension and glow without heavy layering makes it an ideal technique for the modern consumer seeking both efficacy and a refined aesthetic.
Anticipated Developments in Underpainting
- Enhanced Product Formulations: More lightweight, long-wearing cream and liquid products.
- Innovative Tools: Brushes and sponges designed for seamless underpainting application.
- Educational Content: Increased tutorials and masterclasses simplifying advanced techniques.
The trajectory of the underpainting technique in 2026 indicates its growing influence, transforming from a professional secret to a mainstream beauty staple.
Its promise of a durable, natural-looking finish resonates deeply with the contemporary desire for makeup that enhances rather than conceals, ensuring its continued relevance in the evolving beauty landscape.
| Key Aspect | Brief Description |
|---|---|
| Technique Overview | Applying contour and highlight before foundation for a natural, diffused look. |
| Longevity Promise | Achieves a seamless finish that lasts up to 12 hours without creasing. |
| Product Focus | Relies on blendable cream/liquid formulas for a skin-like integration. |
| Key Benefit | Creates a naturally sculpted, radiant complexion that looks effortless. |
Frequently Asked Questions About Underpainting
The primary benefit of the underpainting technique is creating a seamlessly blended, natural-looking sculpted effect. By applying contour and highlight before foundation, the makeup appears to emanate from within the skin, rather than sitting on top, resulting in a more integrated and undetectable finish for up to 12 hours.
For optimal underpainting results, cream or liquid formulas are highly recommended. These include cream contour sticks, liquid or cream highlighters, and cream blushes. These products blend more effortlessly into the skin and allow for a natural diffusion once a sheer foundation is applied over them, ensuring a long-lasting finish.
Yes, the underpainting technique can be adapted for oily skin. It is crucial to start with an oil-controlling primer and opt for matte or satin-finish cream products. Setting the underpainted areas with a light application of translucent powder, particularly in the T-zone, will help control excess shine and ensure the 12-hour natural finish.
The longevity of the underpainting technique stems from layering. By applying cream products directly to the skin and then covering them with a sheer foundation, the products are locked in, preventing them from shifting or fading. A final setting powder and spray further secure the makeup, ensuring a durable and natural look for 12 hours.
While underpainting involves a few more steps than traditional makeup, it is accessible for beginners with practice. The key is to start with minimal product, blend thoroughly at each stage, and use sheer foundation. There are numerous tutorials available that simplify the process, making it achievable for anyone to master this technique.
Perspectives on Seamless Beauty
The continued prominence of the underpainting makeup technique underscores a broader shift in beauty standards towards authenticity and effortless elegance.
Its emphasis on a seamless 12-hour natural finish reflects a consumer demand for high-performance products that enhance, rather than mask, natural features.
As 2026 approaches, this method is set to become an even more integral part of both everyday routines and professional artistry, driven by ongoing innovations in product development and application tools.
The focus will remain on achieving a perfected yet natural complexion that withstands the rigors of a full day, proving that true beauty lies in subtlety and longevity.
