The Ultimate Guide to Smokey Eye Mastery for Every Eye Shape in 2025
Advertisements
Mastering the smokey eye is within everyone’s reach in 2025; this ultimate guide provides detailed steps and expert tips tailored to flatter any eye shape, ensuring a stunning and personalized makeup look.
Ready to unlock the secrets of the perfect smokey eye? In 2025, achieving this classic yet versatile look is easier than ever, no matter your eye shape. This The Ultimate Guide to Mastering the Smokey Eye for Every Eye Shape in 2025 will provide you with the tips and tricks you need to achieve a smoky look that complements your features.
Advertisements
The Evolution of the Smokey Eye
The smokey eye has been a makeup staple for decades, but it has evolved significantly over time. From its initially dramatic, almost gothic interpretation to today’s softer, more blended versions, the smokey eye continues to adapt to modern trends and preferences. Understanding this evolution helps appreciate its versatility and lasting appeal.
Classic vs. Modern Smokey Eye
The classic smokey eye typically involves dark, intense shades like black and charcoal, creating a bold and sultry look. In contrast, the modern smokey eye embraces a wider range of colors and techniques, focusing on blending and diffusion for a softer, more wearable effect.
Advertisements
Today’s trends favor warmer tones like browns, bronzes, and even muted purples, offering a more approachable and universally flattering option. The key is to choose colors that complement your skin tone and eye color.
The Influence of Social Media
Social media platforms like Instagram and TikTok have played a significant role in popularizing and diversifying the smokey eye. Beauty influencers and makeup artists constantly share new techniques and product recommendations, making it easier for individuals to experiment and find their perfect smokey eye style.
- DIY tutorials: Step-by-step guides for creating various smokey eye looks at home.
- Product reviews: Honest assessments of eyeshadow palettes, brushes, and blending tools.
- Trend alerts: Updates on the latest smokey eye trends and color combinations.
Understanding Different Eye Shapes
A The Ultimate Guide to Mastering the Smokey Eye for Every Eye Shape in 2025 is understanding your eye shape. Not all smokey eye techniques are created equal; what works for almond-shaped eyes may not be the most flattering for hooded or round eyes.
Hooded eyes have a crease that is partially or completely covered by the upper lid, which can make eyeshadow application a bit tricky. Round eyes tend to be more prominent and can appear larger, while almond eyes are generally considered the most versatile shape.
Identifying Your Eye Shape
To determine your eye shape, stand in front of a mirror and look straight ahead. Observe the shape of your eyes, the visibility of your crease, and the space between your eyelids and brow bone. Consider these common eye shapes:
Almond Eyes: Slightly pointed at the corners, resembling an almond. The crease is usually visible.
Round Eyes: Very circular, with a visible white area above and below the iris. The crease is usually visible.
Hooded Eyes: The upper lid covers most or all of the crease when the eyes are open.
Monolid Eyes: Have little to no visible crease.
Why Eye Shape Matters for Smokey Eye Application
The shape of your eyes significantly impacts how eyeshadow appears and blends. For example, if you have hooded eyes, applying dark eyeshadow all over the lid can make your eyes look smaller and deeper-set. Instead, focus on creating dimension above the crease to lift and open up the eyes.
Tailoring the Smokey Eye to Your Eye Shape
Once you’ve identified your eye shape, you can tailor your smokey eye technique to enhance your features. Here are some tips for creating a flattering smokey eye for each eye shape.
Smokey Eye for Almond Eyes
Almond eyes are the most versatile shape and can pull off almost any smokey eye look. The key is to experiment with different colors and intensities to find what works best for you. Start by applying a medium shade all over the lid, then blend a darker shade into the crease and outer corner.
Add a pop of shimmer to the center of the lid to brighten the eyes and create dimension. Blend, blend, blend!
Smokey Eye for Round Eyes
To elongate round eyes and avoid a “surprised” look, focus on creating a horizontal smokey eye. Apply a dark shade along the upper lash line and extend it outward, slightly winging it out at the outer corner. Keep the eyeshadow close to the lash line and avoid bringing it too far up towards the brow bone.
This technique will create the illusion of a wider, more almond-shaped eye. A subtle highlight on the inner corner can also help balance the look.
Smokey Eye for Hooded Eyes
For hooded eyes, the goal is to create dimension above the crease to lift and open up the eyes. Start by applying a transition shade slightly above the natural crease, blending it upwards towards the brow bone. This will create the illusion of a deeper-set crease. Apply the darkest shade to the outer corner of the eye, focusing on creating a V-shape. Keep the inner corner and center of the lid brighter to draw light to these areas.
- Use matte shades: Avoid shimmery shadows on the hooded part of the lid, as they can accentuate the hooding.
- Tightline: Apply eyeliner to the upper waterline to define the eyes without taking up lid space.
- Set the crease: Use a setting spray to prevent eyeshadow from transferring onto the upper lid.
Smokey Eye for Monolid Eyes
Monolid eyes have a flat surface, which means there is no natural crease to guide eyeshadow placement. To create dimension, use a gradient effect, applying the darkest shade closest to the lash line and gradually blending it upwards towards the brow bone. Use a pencil brush to smudge the eyeliner along the lash lines. This will add depth and definition to the eyes.
Choosing the Right Products and Tools
Achieving the perfect smokey eye requires more than just technique; it also involves using high-quality products and the right tools. Investing in a good eyeshadow palette, a set of blending brushes, and a reliable eyeliner can make a significant difference in the final result.
Essential Eyeshadow Palettes
When choosing an eyeshadow palette for creating smokey eyes, look for one that offers a range of complementary shades in both matte and shimmer finishes. Neutral palettes with browns, beiges, and grays are versatile and can be used to create a variety of looks.
- High pigmentation: Ensures vibrant color payoff and easy blending.
- Good color selection: Provides options for creating both subtle and dramatic smokey eyes.
- Long-lasting formula: Prevents fading and creasing throughout the day.
Blending Brushes: The Key to a Seamless Smokey Eye
Blending is crucial for achieving a smooth and seamless smokey eye. Invest in a set of high-quality blending brushes in various sizes and shapes. Fluffy brushes are ideal for blending out harsh lines, while smaller, more precise brushes are perfect for applying eyeshadow to the crease and outer corner.
Eyeliner and Mascara: Defining Your Eyes
Eyeliner and mascara are essential for completing the smokey eye look. Choose an eyeliner that is easy to apply and long-lasting. A black pencil liner or gel liner is a classic choice for creating a sultry, defined look. Finish with several coats of mascara to add volume and length to the lashes. Choose a mascara that won’t clump or flake.
Mastering the Blending Technique
Blending is arguably the most important step in creating a flawless smokey eye. Without proper blending, eyeshadow can look patchy and uneven. Here are some tips for perfecting your blending technique and building the The Ultimate Guide to Mastering the Smokey Eye for Every Eye Shape in 2025.
The Importance of a Good Transition Shade
A transition shade is a medium-toned eyeshadow that is used to blend the crease color into the brow bone. This helps create a seamless transition between the two shades and prevents harsh lines. Choose a transition shade that is slightly warmer than your skin tone. Start by applying it to the crease with a fluffy blending brush, using windshield wiper motions!
Circular Motions: Start Small, Build Up
When blending eyeshadow, use small, circular motions to gradually build up the color and blend it into the surrounding shades. Start with a small amount of eyeshadow on the brush and gradually add more as needed. It’s always easier to add more color than to remove it.
This allows you to control the intensity of the eyeshadow and prevent it from looking too heavy or overpowering. Be patient and take your time. Blending takes practice, so don’t be discouraged if you don’t get it right away. The more you practice, the better you’ll become.
Clean Your Brushes Regularly
Clean brushes are essential for achieving a flawless blend. Dirty brushes can transfer old eyeshadow onto your lid, which can make the colors look muddy and uneven. Clean your brushes regularly with brush cleaner or mild soap and water. Regular cleaning is a good beauty routine.
Common Mistakes to Avoid
Even with the best products and techniques, it’s easy to make mistakes when creating a smokey eye. Here are some common mistakes to avoid, with the The Ultimate Guide to Mastering the Smokey Eye for Every Eye Shape in 2025.
Applying Too Much Eyeshadow at Once
One of the most common mistakes is applying too much eyeshadow at once. This can make the eyes look heavy and overdone. Instead, start with a small amount of eyeshadow on the brush and gradually build up the color. This will allow you to control the intensity of the eyeshadow and prevent it from looking too harsh.
Build up with a little at a time. This makes the smokey eye process more controlled.
Not Blending Enough
Blending is key to creating a seamless smokey eye, so it’s important to take your time and blend, blend, blend! Not blending enough can result in harsh lines and an uneven finish. Use a fluffy blending brush to blend out the edges of the eyeshadow and create a smooth transition between the shades.
- Go slowly at first.
- Use light pressure to start.
- Don’t overdo it.
Using the Wrong Colors
Choosing the wrong colors can also ruin a smokey eye. While black and gray are classic choices, they may not be the most flattering for all skin tones. Experiment with different colors to find what works best for you. Warmer tones like browns, bronzes, and muted purples are often more universally flattering.
Smokey Eye Looks for Different Occasions
The smokey eye isn’t just for evening events; it can also be adapted for daytime wear. Here are some ideas for creating smokey eye looks for different occasions.
Daytime Smokey Eye: Soft and Subtle
For a daytime smokey eye, opt for soft, neutral shades like beige, brown, and taupe. Apply a light shade all over the lid, then blend a slightly darker shade into the crease. Use a soft brown eyeliner to define the eyes, and finish with a coat or two of mascara.
Keep the overall look soft and subtle, avoiding harsh lines and intense colors. This is the perfect way to add some definition to your eyes without looking too overdone.
Evening Smokey Eye: Bold and Dramatic
For an evening smokey eye, you can go bolder and more dramatic. Use darker shades like black, charcoal, and deep brown. Apply a dark shade all over the lid, then blend a slightly lighter shade into the crease. Line the eyes with black eyeliner and smudge it out for a sultry effect, then finish with several coats of mascara. Add fake lashes for extra drama.
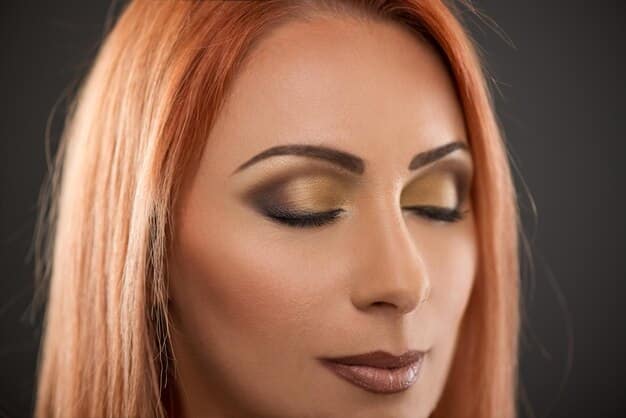
Special Occasion Smokey Eye: Glamorous and Sparkling
For a special occasion like a wedding or party, add some sparkle to your smokey eye. Use shimmery eyeshadows in shades like gold, bronze, or silver. Apply a shimmer shade to the center of the lid to brighten the eyes and create dimension. Add a touch of glitter to the inner corner for extra glamour.
| Key Aspect | Brief Description |
|---|---|
| 🎨 Eye Shape | Adapting techniques based on whether eyes are almond, round, hooded, or monolid. |
| 🖌️ Blending | Mastering smooth transitions with quality brushes and transition shades. |
| ✨ Products | Selecting high-pigment shadows, reliable eyeliners, and volumizing mascaras. |
Frequently Asked Questions
▼
A palette with a range of neutral shades in matte and shimmer finishes works well. Consider palettes offering browns, grays, and blacks for versatile looks.
▼
Use an eyeshadow primer before applying any eyeshadow. Set your eyeshadow with a setting spray to lock it in place and prevent creasing throughout the day.
▼
Yes, but opt for softer shades and avoid heavy eyeliner. A neutral smokey eye with browns or taupes can be perfect for daytime wear.
▼
A black or dark brown pencil eyeliner is ideal for smudging and creating a sultry look. Gel eyeliner also works well for more defined lines.
▼
Clean your brushes at least once a week to remove buildup and prevent bacteria. Use brush cleaner or mild soap and water for thorough cleaning.
Conclusion
Mastering the smokey eye for your eye shape is an achievable goal with the right techniques, products, and a little practice. The versatility of the smokey eye makes it a timeless choice for any occasion, allowing you to enhance your natural beauty and express your personal style.